PowerShell – Runspaces and Large Enterprises

You’ve got 40gb of log files, a broken app, and a CFO reminding you how much money the company is losing per minute. You’ve got to find that one error in one log that will clue you in on how to fix the issue. You have no idea where it is, but you know you have this issue in the bag. How? Because you have PowerShell. I’m going to show you how.

We’ve all been there – a task that has to be done across hundreds of systems, a search of thousands of files, pulling a property from tens of thousands of AD user accounts. PowerShell can do it, but there is always a need to shave those seconds off. In this article we examine how to perform these large action in the quickest possible ways.

Asynchronous Processing

PowerShell has a couple of options when it comes to running tasks in a ‘multi-threaded’ fashion. The two you will primarily hear about are workflows and runspaces (jobs are another topic). Workflows are dead easy to setup, but can be picky about what they will and will not allow to happen in them. Workflows do have the nice feature of sequencing – being able to tell part of the workflow to run in sequence, then run other parts in parallel. Runspaces are more difficult to setup initially, but allow essentially any action you desire. Runspaces also allow for insane parallel processing. In my personal preference, runspaces are always in my toolbox. It becomes a no-brainer when you combine some of the work that the PowerShell heavy-weights have done to make runspaces super easy. Mainly Boe Prox and Warren F. These guys are serious rock-stars.

Invoke-Parallel – Your new best friend

When you absolutely, positively have to burn up those CPUs and flood the network, you need Invoke-Parallel. Seriously, download it now. I made that a link for a reason. Go get it. Using this beast, we can run multiple commands against 20,000 remote server nodes every evening. We can put thousands of SCOM nodes into maintenance mode in a matter of minutes, or search hundreds of directories with thousands of files in a matter of seconds. This is one function that will elevate your PowerShell game. It’s all built on runspaces, and has some amazing logic wrapped around it.

From Github you will get a .ps1 file. You can either pull the function out of that file and include it in your script, dot-source the whole .ps1 file (. “C:\temp\invoke-parallel.ps1”), or take the function and wrap it up in a module. That is my preferred method, since I wrap it up with other useful functions. Regardless of how you reference the function, calling it is easy. Here is a simple example:

. "c:\blog\Parallel\invoke-parallel.ps1"
$servers = 'server1','server2','server3'
Invoke-Parallel -InputObject $servers -ScriptBlock {Test-Connection $_ -Count 1 -Quiet}

This is pretty straight forward. I am dot-sourcing the ps1, Generating an array that has 3 servers in it, and then sending that array to the Invoke-Parallel function as the InputObject parameter. This couldn’t be easier, and guess what? You just ‘multi-threaded’ a PowerShell script. Pat yourself on the back, and then buy Boe and Warren a drink the next time you see them.

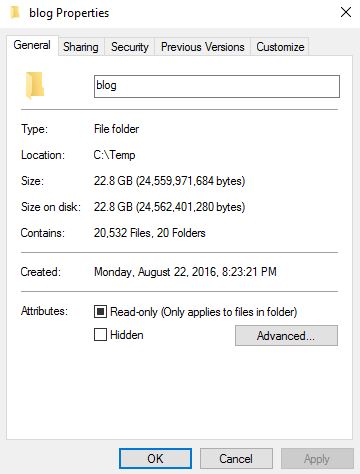
Now invoking these runspaces doesn’t come free – there is an overhead and startup time associated with starting a runspace, and that might actually be a detriment to your outcome. For example, if I have 20,000 log files that are relatively small (10mb or less), and you need to do a “select-string -pattern ‘something'”, then it might not be advantageous to run invoke-parallel. Let’s look at the time it takes to find an error in one of those logs files with each method. In a previous blog post, I created a function to create a lot of log files with random data – I am using that here to create 20,000 log files of about 1mb in size. (side-note: I will later be expanding that function to take advantage of invoke-parallel).
dirproperties

I have edited a random file and added this line somewhere in the middle:
2016-08-21–ERROR–TOO MANY FILES, IDIOT.
I have idea which one I edited. That’s how dedicated I am to this cause. Now, let’s measure how long it takes to find this string both with and without invoke-parallel.
Without:

PS C:\blog\Parallel> Measure-Command{Get-ChildItem c:\Temp\blog -recurse | Select-String -pattern "ERROR"}


Days              : 0
Hours             : 0
Minutes           : 2
Seconds           : 11
Milliseconds      : 966
Ticks             : 1319662757
TotalDays         : 0.00152738745023148
TotalHours        : 0.0366572988055556
TotalMinutes      : 2.19943792833333
TotalSeconds      : 131.9662757
TotalMilliseconds : 131966.2757

With:

Measure-Command{
	. "c:\blog\Parallel\invoke-parallel.ps1"
	$files = Get-ChildItem c:\Temp\blog -Recurse
	Invoke-Parallel -InputObject $files -Throttle 8 -ScriptBlock { $_ | Select-String -Pattern 'ERROR' }
}

Days              : 0
Hours             : 0
Minutes           : 4
Seconds           : 1
Milliseconds      : 880
Ticks             : 2418807160
TotalDays         : 0.00279954532407407
TotalHours        : 0.0671890877777778
TotalMinutes      : 4.03134526666667
TotalSeconds      : 241.880716
TotalMilliseconds : 241880.716

Because the files are small, the Select-String can process them faster then we can spin up new runspaces. But, if we change the size of the files – say to something like 1GB, the difference is dramatic.
Without Invoke-Parallel:

PS C:\blog\Parallel> Measure-Command{Get-ChildItem c:\Temp\blog -recurse | Select-String -pattern "ERROR"}


Days              : 0
Hours             : 0
Minutes           : 5
Seconds           : 12
Milliseconds      : 368
Ticks             : 3123680771
TotalDays         : 0.00361537126273148
TotalHours        : 0.0867689103055556
TotalMinutes      : 5.20613461833333
TotalSeconds      : 312.3680771
TotalMilliseconds : 312368.0771

And with:

Days              : 0
Hours             : 0
Minutes           : 2
Seconds           : 15
Milliseconds      : 444
Ticks             : 1354442030
TotalDays         : 0.00156764123842593
TotalHours        : 0.0376233897222222
TotalMinutes      : 2.25740338333333
TotalSeconds      : 135.444203
TotalMilliseconds : 135444.203

It halved the time it took to process those files. Why? Because we could load up multiple select-strings at a time as each was long-running. Each individual select-string is not CPU intensive, it just takes time. In this instance I could process 40GB of files in 2.25 minutes, whereas before I could only do 20gb in 4 minutes. This tells us that runspaces are great for commands or scripts that take a bit longer to run and aren’t horribly CPU intensive.

All of this brings me to the title of this article – when you are dealing with an absolute massive amount of machines, or AD accounts, or large files – whatever the case may be – invoke-parallel should be in your toolbox. At my current job, I have 6 commands to run every night on around 18,000 servers. I can run these through 8 jump servers – I pipe invoke-commands through a large invoke-parallel with a throttle of 80, and can finish this job in about 3 hours. Prior to using invoke parallel, it was taking about 18 hours to complete. That is how you utilize a network.

The main parameters that we typically deal with when using Invoke-Parallel are the InputObject, the Throttle, the ScriptBlock (or ScriptFile), and the Timeout. The InputObject is an array that is the basis for the function. In essence the function will open a runspace for each object in the array. It could be an array of servers, array of users, or a list of files. The throttle is how many runspaces you want running at the same time. Avoid the temptation to set this value too high – it can actually be detrimental if too many runspaces are vying for the same resources (CPU/MEM/Disk). A good rule of thumb for my environment is to limit it to the number of processors on the system running the task. If I am using multiple servers to run tasks, or if the tasks have extremely minimal requirements, I might set it higher. Timeout is how many seconds you want the runspace to run before it is killed. This is typically used to free up runspaces that have encountered a problem – hung commands and such. The last parameter – the ScriptBlock (or scriptfile) is what you want to actually happen in the runspace. Take this example:

$sites = 'www.google.com','www.cnn.com','www.microsoft.com','www.reddit.com'
. "C:\blog\Parallel\invoke-parallel.ps1"
invoke-parallel -InputObject $sites -scriptblock {Test-Connection $_ -quiet}

In this case, the ScriptBlock is a simple test-connection. The $_ is the reference to the current object being processed by this runspace. In this example it was a single url, but it can also be an object with properties, which you would access as any other property ($_.name, $_.Size, etc…). Inside the scriptblock, there are 2 option for accessing variables that are declared outside of the scriptblock. You can either use the ‘$using:variable’ method, or you can specify the ‘-ImportVariables’ parameter for Invoke-Parallel. Along those same lines, if you want to use modules that are imported outside of the runspace, you can use the ‘-ImportModules’ parameter.

This example expands on the script block a bit, and shows how to use the -ImportVariables parameter:

$sites = 'www.google.com','www.cnn.com','www.microsoft.com','www.reddit.com', 'www.powershell.org','www.draith.com','www.bing.com','www.arstechnica.com','www.bbcnews.com'
$texttofind = 'PowerShell'
. "C:\blog\Parallel\invoke-parallel.ps1"
invoke-parallel -InputObject $sites  -ImportModules -ImportVariables -scriptblock {
    if (Test-Connection $_ -quiet -count 1)
    {
        try
        {
            $result = Invoke-WebRequest -Uri $_ -UseBasicParsing|select-string -Pattern $texttofind
            if ($result)
            {
                Write-output $_
            }
        }
        catch
        {
            Write-Verbose 'Error getting site data.'
        }
    }
}

These are the basics of Invoke-Parallel. If you have any questions, feel free to leave a comment or ping me via email. In a future post we will go over jobs and how they compare to runspaces. See you then!

Again – special thanks to Boe Prox and Warren F. You guys make this stuff look easy.

‘Why Not?’ Series – PowerShell, IFTTT, and Smartthings

Ever wanted to turn your kitchen lights off from a command line?

OF COURSE YOU HAVE.

In another addition of my ‘Why Not?’ series, I explore how to bring the power of IFTTT and SmartThings to PowerShell.

SmartThings is a home automation suite that consists of a central hub, z-wave or Zigbee switches, outlets, light bulbs, smoke detectors, water sensors, etc… Thousands of devices exist that integrate with the SmartThings system, and it has an accessible API. I swear, this is not a paid advertisement. It just happens to be the system I use in my home automation. One night I was sitting at home wondering why I had to use an app or even my Harmony remote to turn off the lights in my man-cave. I was working on a PowerShell script, and that’s when it hit me – ‘Why Not?’ – Why can’t I use PowerShell to turn those off these lights?

Let’s assume you have SmartThings setup in your home already, and that you have signed into the https://graph.api.smartthings.com/ portal at least once. If that is done – we simply need to head over to IFTTT. If you need a primer on IFTTT, head here: https://ifttt.com/wtf. Yeah, I am NOT going to change that link – it’s awesome. If you already have an IFTTT account, sign in. If not, sign up. Once signed in, we will want to add a new channel. The channel we want to add, ironically enough, is called SmartThings. Click on the “Channels” link, search for SmartThings, and click on the Icon (should be the only one returned if you search correctly). Click the Icon.
IftttFindSmartThings

Now click on the GIANT connect button on the right hand side. It will take you to the SmartThings Api login page. Sign in, and you are greeted with this:
iftttpicklocation
Pick the Hub/Location that you want to integrate with IFTTT. When you do, you are shown a list of devices connected to your SmartThings hub:
iftttpickdevices
Select the devices you want to control, and press the “Authorize” button. You will be taken back to IFTTT. Don’t try to add any recipes yet – we need one more channel to make this work. In order to get IFTTT to trigger, we can use either the DO channel/app (which I am going to ignore in this demo), or we can use the Maker channel. Search for, and add the Maker channel just like we did for the SmartThings channel.
iftttmaker
When you add the Maker Channel, a key is automatically generated for you. Keep this key handy – we will be using it soon. I am not showing you my key, cause I barely know you guys – and it is unique to my recipes.
iftttmakerkey

Great – now what? Let’s add a recipe!! Click the “Create a New Recipe button”, and you are shown the typical IFTTT recipe builder page that looks like:
iftttthis
Click on the “this” portion, and search for/select the Maker channel:
iftttmakerthis
Pick the “Receive Web Request” tile. We now need to name our trigger. These will be unique to each device, and unique to the function we are calling. For example, if I want to turn on and off my Man-Cave Lights, I need to specify two unique triggers. Leave out spaces in this name.
iftttmakertrigger-mc
Create the trigger. BOOM – we are back the equation:
iftttthat
Click the ‘THAT’ section. We are dropped back to the channel search page – this time it’s the search for the Action channel – type in and select ‘SmartThings’. You should see a list of all the fun things that SmartThings brings to IFTTT.
iftttactionSmartthings
Choose the ‘Switch On’ tile. You can now pick the switch you want to interact with. In my example I will choose ‘Man Cave Lights’
iftttchoosedevice
One final step – click “Create Recipe”. Done! Now, create another new recipe, following the same steps, except name the Maker trigger something like ‘Man_Cave_Lights_Off’, and make sure you select the ‘Switch Off’ tile in the action section. You should now have 2 recipes – one for turning the lights on, another for turning the lights off. If you check the My Recipes section, you should have something along the lines of these two:
iftttrecipes

We are done in IFTTT for the moment – let’s head over to PowerShell.

This is pretty straight-forward, actually. We need to craft a URL with this format: https://maker.ifttt.com/trigger/{event}/with/key/{key}. The {event} is the Maker event we specified when we created the recipe – they {key} is the unique key that was generated when we added the Maker channel. All we need to do is craft the URL and send the web-request.

$MakerKey = 'abcdefghijklmnopqrstuvwxyz'
$BaseURL = 'https://maker.ifttt.com/trigger/'
$EndURL = "/with/key/$MakerKey"
$event = 'Man_Cave_Lights_On'
$url = $BaseURL+$event+$endurl
Invoke-WebRequest -uri $url -UseBasicParsing|Select-Object -Property content

Again, we use the -UseBasicParsing parameter to keep from firing up IE initial config. If we have done everything right, we should be greeted with something along the lines of:
Content
——-
Congratulations! You’ve fired the Man_Cave_Lights_On event

Want proof? Here you go!

20160827_234150

Once you add the Maker Channel, it opens a world of possibility up when it comes to IFTTT. For example, I later added my Harmony remote as a channel and was able to turn my AV system on and off and perform a large number of automations from PowerShell. Oh, the trouble we will get into….

PowerShell – Create a ton of random files filled with text

While working on an upcoming blog post, I found myself in the need to create a lot of files filled with random data. I know there are plenty tools out there that will create files, but the bulk of them create empty files – I needed them filled with a considerable amount of text data. So I did what any good PowerShell guy does – I built it myself using ideas from everyone else!

Download the function on GitHub!

Basically we are using the old “Lorem Ipsum” block of text and filling single files until it reaches about the right size. In this example, I am not really concerned about getting the EXACT size. In fact, I included a ‘Variance’ parameter to allow the size to get a bit more random – setting this will make the size of each file larger or smaller by the variance amount. Also included is a pair of parameters that handle sub-directory creation and sub-directory creation chance. At this time it will only go one layer deep, but in future releases I will allow nested subdirectories.

Here is the help text:

<#
	.SYNOPSIS
		Creates a number of auto-generated files in the spcified directories.
	
	.DESCRIPTION
		This function will supply any number of files approximately at the size you request.  Rather than setting a file size, this function actually fills the files with text until they reach the requested size.  You can control the number of files, size of files, and whether or not to create random sub-directories.
	
	.PARAMETER Path
		The top level path where the script will begin to create files.   C:\Temp, for example
	
	.PARAMETER FileTypes
		The types of files to create.  This parameter expects an array of values.  For example:  'log','log1','log2'
	
	.PARAMETER Size
		Size of each individual file.  This parmeter is added to, or subtracted from, by the variance parameter.  This value is in MB.  Exact sizes will vary, and larger file sizes will lead to larger variance.
	
	.PARAMETER Variance
		This parameter is added to, or subtracted from, the Size parameter to get a semi-random file size.  Blocks of text are added to the files, so exact file sizes will be random within a range.
	
	.PARAMETER SubDirectories
		Specify if this script should create subdirectories under the directory specified by the Path parameter.  Directories will have random names similar to file names, and there is a random chance of them being created (specified by the SubDirectoryCreateChance parameter)
	
	.PARAMETER Count
		The number of files to create under the directory specified by the Path parameter
	
	.PARAMETER SubDirectoryCreateChance
		The chance that a subdirectory will be created.  Larger numbers here will actually make it less likely that a subdirectory is created.  A number of 20 means that 1-in-20 will create a subdirectory.  A number of 100 means that 1-100 will create a subdirectory.
	
	.EXAMPLE
		PS C:\> Create-Files -Path c:\Temp\blog -FileTypes log, log1, log2, log3, log4, log5, log6, log7, log8 -Size 3 -Count 100

	.EXAMPLE
		PS C:\> Create-Files -Path c:\Temp\blog -FileTypes log, log1, log2, log3, log4, log5, log6, log7, log8 -Size 1 -Count 20000 -SubDirectories True -SubDirectoryCreateChance 50	
	
	.EXAMPLE
		PS C:\> Create-Files -Path c:\Temp\blog -FileTypes log, log1, log2, log3, log4, log5, log6, log7, log8 -Size 10 -Count 50 -Variance 4 -SubDirectories True -SubDirectoryCreateChance 10
	
#>

Let’s look at the examples:

Create-Files -Path c:\Temp\blog -FileTypes log, log1, log2, log3, log4, log5, log6, log7, log8 -Size 3 -Count 100

This example will create log files in the c:\temp\blog directory. It will create 100 files with a size of approximately 3MB. It will do so in only one directory.

Create-Files -Path c:\Temp\blog -FileTypes log, log1, log2, log3, log4, log5, log6, log7, log8 -Size 1 -Count 20000 -SubDirectories True -SubDirectoryCreateChance 50	

This example will create log files in the c:\temp\blog directory. It will create 20,000 files with a size of around 1MB. It has a 1-in-50 chance on each file of putting it in a sub-directory.

Create-Files -Path c:\Temp\blog -FileTypes log, log1, log2, log3, log4, log5, log6, log7, log8 -Size 10 -Count 50 -Variance 4 -SubDirectories True -SubDirectoryCreateChance 10

This final example will create log files in the c:\temp\blog directory. It will create 50 files of approximately 10MB, plus or minus 4MB. It has a 1-in-10 chance of creating subdirectories.

This fun little script is up on GitHub at the link above. Feel free to leave any comments or suggestions! I am already planning to add nested sub-directories, disk space checking, and multi-threading the creation to decrease generation time.

Thanks!

PowerShell on Linux – Try it Out Fast!

Unless you have been living under a rock, you probably heard that Microsoft Open-Sourced PowerShell and made it available on Linux/MacOS!. Everyone wants to give this thing a try. Want to test it out quick? Here’s how:

Versions used in this example:
Windows 10 Build 10586.545 (Hyper-V Host)
CentOS 7
WinSCP 5.9.1

A quick assumption (I know – we all know what happens when we assume) – You already have Hyper-V up and running. If not, read this post by @adbertram about Essential PowerShell Cmdlets For Managing Hyper-V. It’s a really well put together article.

Start by downloading CentOS. The link above will take you to the download page – in this example I will use the DVD ISO. Since the PowerShell repo is still in Alpha, I am going to stick with CentOS. Open Hyper-V Manager, and create a new VM. Do this by right-clicking on your computer in the tree pane, and selecting New – Virtual Machine.

new-virtualmachine

Click through the wizard, choosing a VM name, the generation (I used 2 for this demo), memory (8gb), the network (make sure it has internet access), where to store the VHD, and finally – under the installation options – select “Install an operating system from a bootable image file”. Point it to the CentOS iso you downloaded previously. Finish the wizard.
vmsummary

Before we start the VM we will need to disable Secure Boot, otherwise we won’t be able to load the DVD image. Right click on the new VM, click Settings, Security, and uncheck the box for Secure Boot.
secureboot

Start and connect to the VM. When this menu appears, select ‘Install CentOS 7″.
installcent

Installing CentOS is pretty straight forward. Select your language for setup, click Continue. On the next screen, you are going to see the “Installation Summary” screen. Here you will probably see some items marked with a classic warning symbol. In my demo, it was the “Installation Destination” section. Simply going into that section and selecting done is enough to clear it. There is, however, one change we want to make before starting the installation. Click on the “Network & Host Name” section, set the hostname, and turn on eth0. We need this vm to be able to access the internet, which is difficult without an active network adapter.
network2

Click Begin Installation. The install will begin to run, and during this time you should go ahead and set the root password, and create a non-root user (not required, but a good idea anyway). Setup doesn’t take long, so in a few minutes we are presented “Complete!” message. Click the Reboot button.

Within a minute or two, you should be presented with a CentOS Linux 7 login. Go ahead and log in with root.
rootlogin

If you don’t already have it installed, download and install WinSCP. We are going to need to get the RPM for PowerShell from Github, and move it to the CentOS VM. For this demo, we can get the RPM here. Once we have the RPM downloaded, launch WinSCP and connect to the CentOS VM. Depending on networking, it might be necessary to connect via IP address. In order to get the IP in this minimal CentOS install, we are going to need to use ‘ip addr’. Note the IP for eth0.
ip

In WinSCP, connect to the VM using root, and copy the rpm to the /tmp directory.
winscp

Now the fun begins. Go back to the CentOS VM, and run the following command:

sudo yum -y install /tmp/powershell-6.0.0_alpha.9-1.el7.centos.x86_64.rpm

This command tells the VM to install the PowerShell rpm we downloaded, and the ‘-y’ tells it to automatically install the 2 dependencies. When it’s done, you are rewarded with something like this
powershellinstalled

Once this is done – we have PowerShell on this CentOS VM. That is not something I thought I would type anytime soon 🙂 Why don’t we see if it works. It’s basically another shell, so let’s start by typing ‘powershell’.

psprompt

Take a moment to look at this – a Microsoft PowerShell prompt, running in a Linux VM. Want proof? Do a get-service, but look for something uniquely *nix.
get-process

And there you go. Microsoft dropped the mic in a big way on this one. VERY well done.

‘Why Not?’ Series – PowerShell and Steam – An Exercise in Invoke-WebRequest

During my day job I tend to get into situations where I have to make PowerShell connect to systems and applications that are atypical. A lot times, the easiest way to integrate PowerShell and these systems is the humble invoke-webrequest. It’s not a big stretch to bring that home to the ‘fun’ projects. In that vein – let’s make PowerShell talk to Steam – because ‘Why Not?’.

Steam has a pretty well documented web api, and as such, this is a pretty easy integration to get get going. I will mostly be using invoke-webrequest, since the API we are dealing is the Steam Web API. The API is mainly documented here. Another GREAT resource is this site. I won’t dig into the client side API in this post – that post is coming soon.

Let’s start by doing something simple. Let’s get a list of the api interfaces. A simple invoke-webrequest can get the data. By default, the Steam Web Api will return data in a json format, but for our demonstration I am going to get it in an XML format.

[xml]$interfaces = Invoke-WebRequest http://api.steampowered.com/ISteamWebAPIUtil/GetSupportedAPIList/v1/?format=xml -UseBasicParsing

I am using the ‘-UseBasicParsing’ switch in order to not have to initialize the IE engine and avoid performing IE initial setup. You will notice that I use the [xml] prefix to tell PowerShell to expect an XML return, and in the url I specify the xml format. Other valid formats to use in the url include json (default if nothing is specified), and vdf. If we examine the $interfaces variable, we can eventually dig down to this:

PS C:\Users\Draith> $interfaces.apilist.interfaces.interface

name                       methods
----                       -------
IGCVersion_205790          methods
IGCVersion_440             methods
IGCVersion_570             methods
IGCVersion_730             methods
IPortal2Leaderboards_620   methods
ISteamApps                 methods
ISteamBitPay               methods
ISteamDirectory            methods
ISteamEnvoy                methods
ISteamNews                 methods
ISteamPayPalPaymentsHub    methods
ISteamRemoteStorage        methods
ISteamUserAuth             methods
ISteamUserOAuth            methods
ISteamUserStats            methods
ISteamWebAPIUtil           methods
ISteamWebUserPresenceOAuth methods
ITFSystem_440              methods
IPlayerService             methods
IAccountRecoveryService    methods

Lots of interfaces here, but one immediately catches the eye – ISteamApps. How do we access that one? Well, we would need to look at the methods associated with that interface.

PS C:\Users\Draith> $interfaces.apilist.interfaces.interface|Where-Object {$_.name -eq 'ISteamApps'}|Select-Object -ExpandProperty methods

method                                                      
------                                                      
{GetAppList, GetAppList, GetServersAtAddress, UpToDateCheck}

There we go – looks like 2 GetAppList methods, and 2 others. If we were to dig a bit deeper, we would see that the GetAppList methods are version 1 and version 2. Let’s use version 2 for this example. Now that we know the Interface (ISteamApps) and the method (GetAppList), we can craft the web request as documented in the Steam Web Api.

[xml]$apps = invoke-webrequest -uri 'http://api.steampowered.com/ISteamApps/GetAppList/v0002/?format=xml' -UseBasicParsing

This is a very similar request to the first one we used to get the interfaces, only we are now supplying the interface and the method. Notice the v0002 portion – it’s the version. Again we told the request to use the XML format.

PS C:\Users\Draith> $apps.applist.apps.app

appid name                                                         
----- ----                                                         
5     Dedicated Server                                             
7     Steam Client                                                 
8     winui2                                                       
10    Counter-Strike                                               
20    Team Fortress Classic                                        
30    Day of Defeat                                                
40    Deathmatch Classic                                           
50    Half-Life: Opposing Force                                    

<and many many many more>

Wow – we just pulled back a list of every game published to Steam. I am not sure what the status has to be (Alpha, Beta, Pre-Order, etc..), but you can see the list is very extensive – almost 29000 games when I wrote this post. We stored this data in the $app variable so we only have to pull it once (really don’t want to tick off Gabe by pulling this multiple times).

Now that we have this, what good is it? Well, for a good portion of the Web Api’s, we will need to know an AppID. If we wanted to get the AppID for a specific game, we can do something like this:

PS C:\Users\Draith> $apps.applist.apps.app|Where-Object {$_.name -like '*kerbal*'}

appid  name                     
-----  ----                     
220200 Kerbal Space Program     
231410 Kerbal Space Program Demo

There we go – Kerbal Space Program (KSP) has AppID of 220200 for the main (non-demo) game. Great! Why don’t get see if we can get the latest news on KSP? Remember our $interfaces variable? One of the interfaces was ISteamNews. Looking at the methods on ISteamNews we find this:

PS C:\Users\Draith>$interfaces.apilist.interfaces.interface|Where-Object {$_.name -eq 'ISteamNews'}|Select-Object -ExpandProperty methods

method
------
{GetNewsForApp, GetNewsForApp}

Look familiar? As you can guess, there is a v0001 and v0002 version of the same method. Crafting the URL is pretty easy at this point, except when we try like we did previously, we get this:

PS C:\Users\Draith> invoke-webrequest -uri 'http://api.steampowered.com/ISteamNews/GetNewsForApp/v0002/?format=xml' -UseBasicParsing
invoke-webrequest : Bad RequestBad RequestPlease verify that all required parameters are being sent
At line:1 char:1
+ invoke-webrequest -uri 'http://api.steampowered.com/ISteamNews/GetNew ...
+ ~~~~~~~~~~~~~~~~~~~~~~~~~~~~~~~~~~~~~~~~~~~~~~~~~~~~~~~~~~~~~~~~~~~~~
+ CategoryInfo : InvalidOperation: (System.Net.HttpWebRequest:HttpWebRequest) [Invoke-WebRequest], WebException
+ FullyQualifiedErrorId : WebCmdletWebResponseException,Microsoft.PowerShell.Commands.InvokeWebRequestCommand

Apparently there is a parameter that is missing. How do we find that? Well, we have to dig in a bit:

PS C:\Users\Draith> $interfaces.apilist.interfaces.interface|Where-Object {$_.name -eq 'ISteamNews'}|Select-Object -ExpandProperty methods|Select-Object -ExpandProperty method|Where-Object {$_.version -eq 2}|Select-Object -ExpandProperty parameters|Select-Object -ExpandProperty parameter

name      type   optional description
----      ----   -------- -----------
appid     uint32 false    AppID to retrieve news for
maxlength uint32 true     Maximum length for the content to return, if this is 0 the full content is returned, if it's less then a blurb is generated to fit.
enddate   uint32 true     Retrieve posts earlier than this date      (unix epoch timestamp)
count     uint32 true     # of posts to retrieve (default 20)
feeds     string true     Comma-seperated list of feed names to return news for

There we go – a list of the parameters that the interface expects. The only mandatory one (optional = false) is the appid. Let’s try our web request again, but supply the appid this time:

[xml]$kspnews = invoke-webrequest -uri 'http://api.steampowered.com/ISteamNews/GetNewsforapp/v0002/?appid=220200&amp;format=xml' -UseBasicParsing

Notice how we have the interface set(ISteamNews) and the method (GetNewsForApp), and the version (v0002), as well as supplied the appid (220200). That leaves us with something like this:

PS C:\Users\Draith> $kspnews.appnews.newsitems.newsitem

gid : 252584970553375805
title : What No Man's Sky could learn about exploration from Kerbal Space Program
url : http://store.steampowered.com/news/externalpost/pcgamer/252584970553375805
is_external_url : true
author :
contents :
To get a jump start on No Man s Sky s space sandbox, some of our staff are playing the game on PS4 this week. Read more of our different opinions on the game as we continue to play.
My journey in No Man's Sky has so far been like going to a thri

<And much much more>

Great – what do we actually have? If we go a gettype() on $kspnews.appnews.newsitems.newsitem we find it’s an array. That makes it fairly simple to manipulate via the pipeline:

PS C:\Users\Draith> $kspnews.appnews.newsitems.newsitem|foreach{$_.title}
What No Man's Sky could learn about exploration from Kerbal Space Program
PC Gamer UK Podcast 019: Top 100 picks
Kerbal Space Program patch 1.1.3 is now available!
Kerbal Space Program Lead Dev Quits For Planets New
Kerbal Space Program lead developer calls it quits
Patch 1.1.2 is now available!
Kerbal Space Program patch 1.1.1 is now available!
Kerbal Space Program Launches Patch 1.1
Kerbal Space Program update 1.1 ???Turbo Charged??? is now available!
Midweek Madness - Kerbal Space Program, 40% Off
The Games That Got Away In 2015
Best Simulation 2015 Kerbal Space Program
Weekend Deal - Kerbal Space Program, 40% Off
The RPS Advent Calendar, Dec 13th: Kerbal Space Program
SteamController Support for KSP!
KSP 1.0.5 is Live
Kerbal Space Program update 1.0.5 adds sea landings, gives Val a face plate
We won the Golden Joystick for best indie game..
Daily Deal - Kerbal Space Program, 40% Off
Two Unity Awards! Thank you for voting

It’s a small leap to pull back the details for a particular news article. For example, if we wanted to see the details on the 1.1.2 patch, we can do this:

PS C:\Users\Draith> $kspnews.appnews.newsitems.newsitem|Where-Object{$_.title -eq 'Patch 1.1.2 is now available!'}|Select-Object -ExpandProperty contents

[img]http://i.imgur.com/plC31xC.png[/img]
Hello everyone!
We noticed a number of issues persisted through the 1.1.1 patch earlier this week. We???re releasing patch 1.1.2 to address these issues before we head off to a long overdue vacation for the next couple of weeks. Patch 1.1.2 addresses issues with the user interface and landing legs, amongst others.
Check out the full changelog on [url=http://forum.kerbalspaceprogram.com/index.php?/developerarticles.html/kerbal-space-program-patch-112-is-now-live-r191/]our forums[/url].
The Patch will start downloading through your Steam client automatically.

Pretty nifty – you can manipulate the content from there as normal html.

Getting the news is one thing, but what if you wanted to get a bit more data – something a little more exciting like the number of players actually _playing_ the game at the moment. Again – a simple invoke-webrequest can pull that – this time using the ISteamUserStats interface:

PS C:\Users\Draith> (Invoke-WebRequest -uri 'http://api.steampowered.com/ISteamUserStats/GetNumberOfCurrentPlayers/v0001/?appid=220200&format=json' -UseBasicParsing|convertfrom-json).response|Select-Object player_count

player_count
------------
        2548

There you go! We just pulled back the live player count for a steam game using PowerShell! This invoke is slightly different than the previous ones – here we are pulling the data in a json format, piping that to a ConvertFrom-Json cmdlet, and only selecting the response property. From that we pull the player_count.

One more example using invoke-webrequest – lets pull the Achievement percentage for a particular game. In this case, we can’t use KSP because that particular game doesn’t track achievements. Instead, we will use Team Fortress 2 (appid 440). Note that this interface/method uses the parameter gameid, not appid. Don’t ask why, because I have no idea.

PS C:\Users\Draith> $achievements = (Invoke-WebRequest -uri 'http://api.steampowered.com/ISteamUserStats/GetGlobalAchievementPercentagesForApp/v0001/?gameid=440&format=json' -UseBasicParsing|convertfrom-json).achievementpercentages.achievements

PS C:\Users\Draith> $achievements.achievement

name                                                       percent
----                                                       -------
TF_SCOUT_LONG_DISTANCE_RUNNER                   54.461830139160156
TF_HEAVY_DAMAGE_TAKEN                           46.819679260253906
TF_GET_CONSECUTIVEKILLS_NODEATHS                 44.32537841796875
TF_PYRO_CAMP_POSITION                           36.193519592285156
TF_KILL_NEMESIS                                 34.089653015136719

There are plenty of interfaces and interfaces you can pull – GetGlobalStatsForGame, UpToDateCheck (check to see if an app version is up to date), GetServerInfo (check Web API server status), GetWorldStatus (Specific for TF2), etc… Using the appropriate UserID, and the Steam Web API Key, you can even use ISteamUser to get Friends lists, get player profile information, find players achievements for a particular game, and more! Steam has done a great job supplying this API, and with PowerShell, you can access this data with little more than a simple invoke-webrequest.

SiteScope Logging to a SQL AlwaysOn Availability Group

SiteScope can log monitor status and response data to a couple of locations – flat files and databases, primarily.  While useful, it does fail when you attempt to send those logs to a Microsoft SQL Server Availability Group (AlwaysOn). If we use a new driver, however, we can make it work.

Versions:  SiteScope 11.32, SQL 2014, JDBC driver 4.2

The first thing to do is download the latest JDBC driver from Microsoft’s website – https://www.microsoft.com/en-us/download/details.aspx?displaylang=en&id=11774
I downloaded the sqljdbc_6.0.7507.100_enu.exe version since it was the latest at the time of this post. Download the file and open the exe. It will prompt you for an extraction location. You will only need 2 files from this extract, so a temp location is fine. Grab the latest sqljdbc file (sqljdbc42.jar in this case) and copy it to the \WEB-INF\lib directory. From the extract, you also need to grab the sqljdbc_auth.dll file and copy it to the c:\windows\system32 directory on the SiteScope server.

On the SiteScope server, remove the \WEB-INF\lib\sqljdbc.jar file (delete or move it out of the SiteScope directories entirely). Be advised that any previous database connections that use this driver can fail, so test those after removing the file and restarting SiteScope. Launch SiteScope, navigate to Preferences->Log Preferences, and enter “jdbc:sqlserver://:1433;databaseName=;IntegratedSecurity=true;MultiSubnetFailover=true” (without the quotes) as the database connection URL. Enter “com.microsoft.sqlserver.jdbc.SQLServerDriver” (without the quotes) as the database driver. Leave the username and password entries blank.

The important pieces in play here – the updated driver supports the connection property MultiSubnetFailover. That tells the connection it can fail over to another member of the AG. The entry for IntegratedSecurity=true tells the driver that the user that is running SiteScope will be making the connection. It is important that the SiteScope service is running as a user that has rights to Create and Insert on the database.

Restart the SiteScope service. It will attempt to connect to the database in the URL, create a table called SiteScopeLog, and start logging after a few monitor runs (default 20).

Bonus – you can update the table that SiteScope logs to – for example, if you want multiple SiteScopes logging to a single database but have different tables, you can have each log to a table that is unique for that SiteScope. This support article details how you can change the master.config file – specifically the CREATE and INSERT statements.

Hope this article helps. This took way to long to figure out how to do, so I hope it saves you some time.